Beauty devices touch oil, sweat, makeup residue, and sometimes broken skin. That combination can support bacterial transfer. The FDA’s Microbiological Safety and Cosmetics guidance warns that contaminated products may cause infections, especially when used around the eyes or damaged skin. Devices deserve similar caution.
How to sanitize beauty devices to avoid bacterial breakouts? The answer starts with cleaning, not spraying. The CDC’s Guideline for Disinfection and Sterilization states that visible soil must be removed before disinfection. A silicone cleansing brush may look spotless while residue remains inside its grooves. Wash detachable parts with mild soap and warm water. Use a soft, clean brush for seams. Rinse thoroughly, then dry every surface completely. Moisture left beneath a brush head is an overlooked risk.
Follow the manufacturer’s instructions before using alcohol, peroxide, heat, or ultraviolet equipment. Some plastics swell, crack, or lose their protective finish. The FDA also advises following product labeling and avoiding contaminated cosmetic tools. Do not share devices without proper reprocessing. Replace cracked heads and worn applicators. Disinfecting cannot reliably repair damaged materials.
A quick wipe feels clean. Feeling is not evidence. In practice, users often disinfect the handle but ignore charging ports, storage cases, and fingertip contact. That gap deserves attention. Professional infection-control guidance supports a controlled routine: clean, disinfect when compatible, rinse when required, and air-dry fully. No method is perfect. Still, consistent handling lowers avoidable contamination and helps protect the skin barrier.
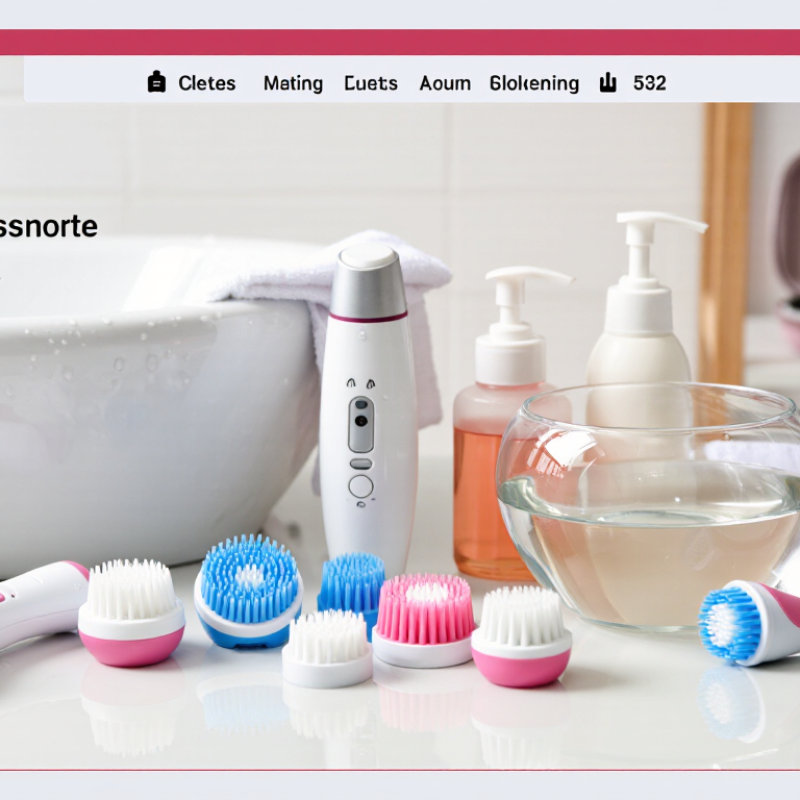
Sanitizing a beauty device begins with classification, not guesswork. Identify whether it has hard, nonporous surfaces, removable attachments, porous materials, or electronic components. Each category handles moisture and disinfectants differently. A metal head may tolerate a compatible disinfectant, while foam, fabric, or silicone parts may require separate care. Never immerse a powered device unless the manufacturer specifically permits it. Liquid can enter seams and create a hidden contamination risk.
Follow the manufacturer’s disinfection instructions exactly, including product type, concentration, contact time, rinsing, and drying requirements. Cleaning removes oils and residue; disinfection works only after that step. Remove detachable parts and inspect grooves, charging ports, and textured edges. Single-use attachments should not be reused. If instructions conflict with a disinfectant label, pause and seek technical guidance. Improvising can damage the device or leave bacteria behind.
Tips: Unplug before cleaning. Use a fresh, lint-free cloth. Keep disinfectant wet for the stated contact time. Do not wipe it away too soon. Let parts dry completely before storage. Store clean attachments in a dry, covered container. Check for cracks, discoloration, or trapped residue. Replace damaged components. I sometimes see users over-sanitize delicate materials, assuming stronger chemicals work better. They often do not. A careful, device-specific routine is safer than aggressive cleaning.
Classify the device first, then follow the manufacturer’s disinfection instructions. The chart shows the safest default handling route for common device categories.
Use a compatible disinfectant, observe the product’s required wet contact time, and never immerse an electrical or non-waterproof device. Manufacturer instructions always take priority.
Visible soil must be removed before disinfection. The CDC’s Guideline for Disinfection and Sterilization explains that dirt, oil, and cosmetic residue can shield microorganisms from disinfectants. A device may look polished but remain contaminated inside grooves. CDC surveillance data also estimates that one in 31 hospitalized patients has a healthcare-associated infection on any given day. Beauty tools are not hospital equipment, yet this figure shows why surface appearance cannot prove safety. Cleaning is a separate step, not a weaker version of disinfection.
Tips: Unplug the device first. Remove detachable parts. Use warm water and a compatible detergent. Scrub seams with a small, clean brush. Rinse away residue, then dry completely. Never spray liquid into vents. Follow the device’s instructions, even when they seem inconvenient.
After visible soil disappears, apply a disinfectant approved for the device’s material and intended use. Respect the label’s contact time. A quick wipe may evaporate too soon. That mistake is easy to make. The U.S. Environmental Protection Agency requires registered disinfectants to provide use directions, including contact time. Keep a simple cleaning log for shared tools. Record the date, product type, and operator. I would still inspect the device under bright light, because missed residue remains possible. No routine is perfect, but skipping cleaning makes disinfection unreliable.
How to Sanitize Beauty Devices Against Bacterial Breakouts?
Small beauty devices touch oil, sweat, makeup, and skin bacteria. A damp storage pouch can worsen contamination. The CDC recommends alcohol solutions between 60% and 90% for disinfecting suitable surfaces. For small, nonporous parts, 70% alcohol is a practical choice. Unplug the device first. Remove visible residue with a clean, dry cloth. Then wipe the surface with 70% alcohol and allow it to remain visibly wet according to the product label. Never soak motors, charging ports, or porous attachments.
The 2023 Global Wellness Economy Monitor valued personal care and beauty at 1.09 trillion dollars in 2022. That scale raises hygiene expectations for home users and professionals. Still, alcohol is not magic. It cannot replace physical cleaning, and it may damage coatings, rubber, or adhesives. The CDC also warns that disinfectants work poorly when dirt blocks the surface. Read the device instructions carefully. My own cautious rule is simple: less liquid, better control. Rushing this step creates hidden moisture.
Tips: Wipe after every use, especially around textured edges. Use a fresh, lint-free cloth. Keep the device dry before storage. Do not mix alcohol with bleach or other chemicals. Replace cracked, stained, or difficult-to-clean attachments. The American Cleaning Institute’s consumer research repeatedly links regular cleaning habits with safer household routines, but consistency remains the weak point. Set a visible reminder. Five careful minutes beat a rushed wipe.
| Step | Device Area or Situation | Surface Classification | Recommended Action | Key Safety and Accuracy Notes |
|---|---|---|---|---|
| 1 | Hands before handling the device | Skin and hands | Wash with soap and running water for at least 20 seconds. If soap and water are unavailable, use an alcohol-based hand sanitizer containing at least 60% alcohol. | Hand hygiene reduces the transfer of bacteria to the device and the face. |
| 2 | Removable, washable, nonporous attachments | Plastic, glass, stainless steel, or other smooth nonporous material | Remove the attachment, wash away visible residue with detergent and water, rinse if appropriate, and dry completely. Then apply 70% alcohol when the material and device instructions allow it. | Cleaning must occur before disinfection because dirt and oils can reduce disinfectant effectiveness. |
| 3 | Small nonporous contact surfaces that cannot be immersed | Smooth, hard, nonporous surface | Wipe or swab the surface with 70% alcohol, ensuring the entire area becomes visibly wet. | Keep the surface wet for the contact time stated on the product label. |
| 4 | Device handle and exterior casing | Hard, nonporous exterior | Unplug or power off the device. Wipe the exterior with a 70% alcohol-moistened cloth or wipe, avoiding openings, buttons that are not sealed, and charging ports. | Do not spray liquid directly onto an electrical device. Follow the manufacturer’s cleaning instructions when they are more restrictive. |
| 5 | Porous pads, fabric covers, sponges, and untreated foam | Porous or absorbent material | Do not rely on a quick alcohol wipe. Wash or replace the item according to the care instructions; discard it if it cannot be effectively cleaned and dried. | 70% alcohol is intended for suitable small, nonporous surfaces, not every material. |
| 6 | Visible makeup, oil, skin flakes, or residue | Soiled surface | Clean first with an appropriate detergent solution and a clean cloth or disposable wipe. Rinse or remove detergent residue when required, then disinfect. | Disinfection is less reliable when organic material remains on the surface. |
| 7 | After use on acne-prone or irritated skin | Device contact surface | Clean and disinfect the contact surface immediately after use, allow it to dry fully, and store it in a clean, dry location. | Do not share a device that has not been cleaned and disinfected between users. |
| 8 | Device with cracks, peeling coating, rust, or trapped residue | Damaged or difficult-to-clean surface | Stop using the device until the damaged part is replaced or the device can be safely cleaned. Discard disposable components that cannot be cleaned. | Damaged surfaces can retain contamination and may injure the skin. |
| 9 | Drying and storage | Clean device and attachments | Allow all surfaces to air-dry completely before reassembly. Store away from bathroom splash, dust, and direct contact with used towels. | Moisture can support microbial survival and may damage electrical components. |
| 10 | Alcohol handling | Flammable liquid | Use 70% alcohol in a well-ventilated area and keep it away from flames, heat, sparks, and smoking materials. | Never use alcohol on a powered or hot device, and never mix alcohol with bleach or other cleaning chemicals. |
Important: The alcohol concentration, wet contact time, material compatibility, and cleaning method should always follow the disinfectant label and the device manufacturer’s instructions. This table applies to routine cleaning of suitable small, hard, nonporous beauty-device surfaces and does not replace professional infection-control guidance.
Beauty devices can collect bacteria from skin oils, makeup, and damp storage areas. Sanitize them after each use, especially when several people share one device. Begin by unplugging the device and removing detachable parts. Follow the manufacturer’s cleaning instructions carefully. Water should never enter vents, charging ports, or sealed components.
Cleaning comes before disinfection. Wipe away visible residue with a suitable cleaner and a fresh, lint-free cloth. Then apply an EPA-registered disinfectant approved for the device’s surface. The label’s contact time is essential. Keep the surface visibly wet for the entire stated period. If it dries too soon, apply more disinfectant. Rushing this step can leave bacteria active.
It may take patience.
A frequent mistake is wiping the solution away immediately because the surface looks clean. That removes the disinfectant before it works. Use gloves when required, maintain ventilation, and never mix cleaning chemicals. Check whether the product is safe for plastic, silicone, glass, or metal. I have found that small grooves and brush fibers are easy to miss, so inspect them under bright light. When the label gives unclear directions, pause and seek professional guidance instead of guessing. Allow the device to dry completely before storage or contact with skin.
Clean beauty devices need more than a quick rinse after use. Residue, moisture, and skin oils can support bacterial growth between treatments. Follow the device’s care instructions, then wipe suitable surfaces with an approved disinfectant. Never soak electrical parts unless the instructions clearly allow it. I have found that rushed cleaning often leaves product inside grooves and around attachments.
Drying is equally important. Pat the device with a clean, lint-free towel, then let it air-dry completely. Avoid closed drawers while the surface still feels cool or damp. Store each device in a clean, ventilated container, away from used towels, makeup, and bathroom splashes. A dry shelf is better than a crowded cosmetic bag. Do not share devices without cleaning them between users.
Tips: Inspect the device weekly, especially around seams and textured heads. Use a small clean brush for hard-to-reach areas. Replace detachable heads when they show cracks, discoloration, persistent odor, or rough edges. Follow the manufacturer’s replacement schedule, even when the part looks usable. A replacement may feel unnecessary, but worn surfaces can be harder to sanitize. Keep a simple cleaning date on your phone. I sometimes forget this step, and that is exactly why a reminder helps. If irritation or unusual breakouts continue, stop using the device and seek qualified medical advice.
Different materials tolerate moisture differently. Metal may handle a compatible disinfectant. Foam, fabric, and silicone may need gentler care. Check removable parts and electronic areas. Guessing can damage the device.
Unplug the device first. Remove detachable parts. Wash away oil, makeup, and visible residue with compatible detergent. Use a small clean brush around grooves and seams. Disinfectant cannot work reliably through dirt.
Usually, no. Never soak powered parts unless the care instructions clearly permit it. Liquid may enter charging ports or seams. Hidden moisture can create contamination and damage risks. Keep vents dry.
Follow the product label’s contact time. The surface should stay visibly wet during that period. A fast wipe may evaporate too soon. I sometimes rush this step. That shortcut deserves reconsideration.
Inspect them under bright light. Use a fresh, small brush for trapped residue. Wipe suitable surfaces with a lint-free cloth. Do not spray liquid into vents. Small details matter.
Pat it with a clean, lint-free towel. Let every part air-dry completely. Avoid closed drawers while the device feels cool or damp. Store it in a clean, covered, ventilated container. A dry shelf works better than a crowded cosmetic bag.
Replace parts with cracks, rough edges, discoloration, or persistent odor. Single-use attachments should not be reused. Follow the recommended replacement schedule. A part can look usable but still hold residue.
Stop using the device temporarily. Review the cleaning, drying, and storage routine. Check for trapped residue or damaged surfaces. Seek qualified medical advice if symptoms continue. No routine is perfect.
How to sanitize beauty devices to avoid bacterial breakouts? Start by identifying the device type and checking its manufacturer’s care and disinfection instructions. Remove detachable parts when permitted, and clean away visible oil, makeup, skin cells, and other residue before applying any disinfectant. Cleaning is essential because surface buildup can prevent disinfectants from working effectively. For small, hard, nonporous surfaces that are compatible with alcohol, a 70% alcohol solution may be used according to safety instructions. Avoid applying liquids to electrical openings, soft materials, or areas that the manufacturer says must remain dry.
For reliable bacterial disinfection, follow the contact time stated on the disinfectant’s approved label, keeping the surface visibly wet for the full required period. Afterward, allow the device to dry completely, then store it in a clean, dry, protected place to reduce recontamination. Clean storage containers regularly, avoid sharing personal devices without proper disinfection, and replace tools that are cracked, worn, or difficult to clean. Consistent cleaning, disinfection, drying, and timely replacement can help support better hygiene and reduce the risk of bacterial breakouts.

Invito Furniture